5 Free SOC Analyst Portfolio Projects for Beginners
Five free, hands-on SOC analyst projects for beginners: Wireshark, Sysmon, a phishing case file with a published hash, and Wazuh SIEM investigations.
September 6, 2026
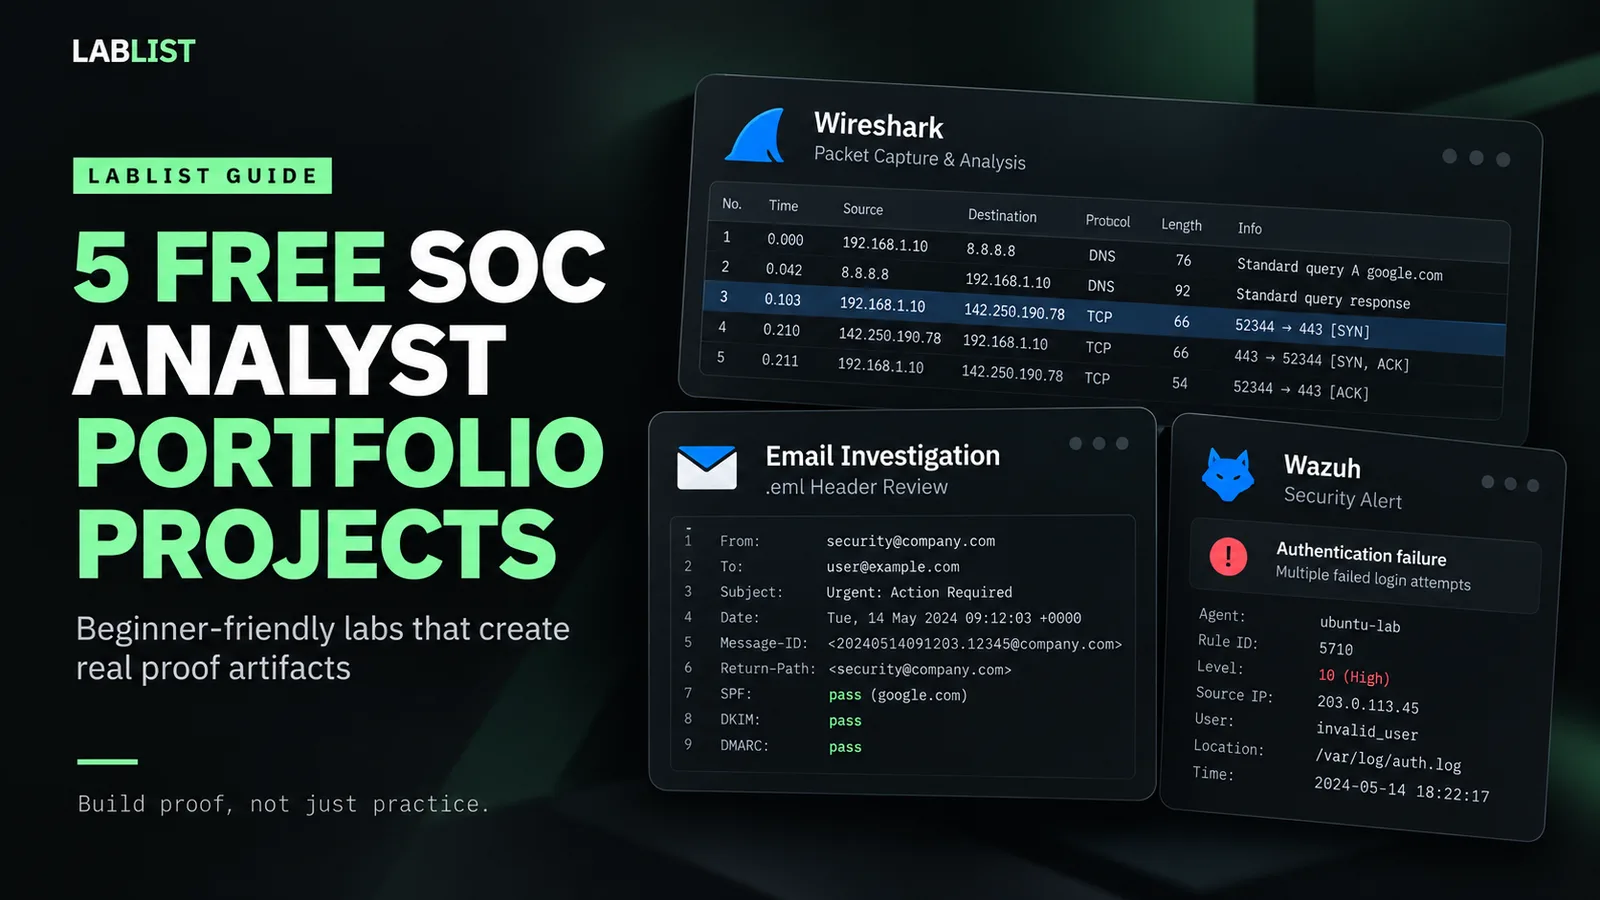
If you're trying to become a SOC analyst, project advice gets complicated surprisingly fast.
Search for SOC analyst projects and you'll find recommendations to build a SIEM, deploy Active Directory, configure an EDR, write detection rules or simulate an attacker. Those can all be useful projects. They also assume you already understand what you're looking at.
Someone preparing for a Tier 1 SOC role needs the pieces underneath that first. You should be able to follow basic network traffic, understand what Windows records when something runs, recognize the evidence inside a suspicious email and work through a simple alert before worrying about advanced adversary simulations.
That's the progression behind these five projects.
The projects are free to complete, increase gradually in difficulty and produce evidence you can actually put into a cybersecurity portfolio: packet captures, Windows events, email headers, SIEM searches, alerts, timelines and analyst notes.
The goal isn't to prove that you installed security software. It's to prove that you can use it to answer a question.
Who Are These SOC Analyst Projects For?
These projects are aimed at someone preparing for a first SOC Analyst, SOC Analyst I, Junior Security Analyst or Tier 1 Security Operations role.
You don't need previous SOC experience, but some basic IT and cybersecurity knowledge will make the projects much more useful. Before starting, terms such as IP address, port, DNS, TCP, process, authentication, malware and phishing should at least be familiar.
If they aren't yet, spend some time on networking and security fundamentals before jumping into the later projects. A SIEM dashboard makes a lot more sense when you understand what the systems feeding it are actually doing.
You don't need all five projects in your portfolio either. Three projects that you understand and can explain are more useful than ten labs you followed step by step and barely remember.
Why These Five Projects?
We used a few requirements when selecting them.
| Requirement | Why it matters |
|---|---|
| Tier 1 relevance | The work should resemble skills used in entry-level SOC roles. |
| Free tools | You shouldn't need enterprise software licenses to build an entry-level portfolio. |
| Repeatable activity | If the project involves a log or alert, you need a reliable way to generate it. |
| Portfolio evidence | The work should produce screenshots, logs, filters, alerts or notes worth documenting. |
| Reasonable scope | You are preparing for Tier 1 analysis, not recreating an APT campaign in your bedroom. |
There is another rule behind the list: installing the software isn't the project.
Installing Wireshark is setup. Finding and explaining a DNS request is the project.
Installing Wazuh is setup. Investigating why an authentication alert fired is the project.
That difference matters when you're trying to prove what you can actually do.
The Five Projects
| # | Project | What You'll Practice | Proof You'll Produce |
|---|---|---|---|
| 1 | Follow a Web Connection with Wireshark | Networking, DNS, IP addresses, ports, TCP/TLS | Filtered packet evidence, DNS activity, connection analysis |
| 2 | What Just Ran? Investigate Windows Processes with Sysmon | Windows logs, processes, command lines, endpoint telemetry | Sysmon events, Event Viewer evidence, process analysis |
| 3 | The Urgent Materials Payment | Spear phishing, BEC, email headers, sender analysis, escalation | .eml analysis, header evidence, case notes, disposition |
| 4 | The Failed Login Alert | SIEM, Wazuh, authentication logs, alert triage | SIEM alert, Windows events, search queries, timeline |
| 5 | Defender Found Something | Endpoint security, malware-alert triage, event correlation | Defender detection, Wazuh evidence, investigation notes |
The order is intentional. You won't touch a SIEM until Project 4.
Set Up a Practice VM
The first Wireshark project can be completed on your normal computer because you're only observing ordinary network traffic. For the Windows projects, use a virtual machine (VM) instead.
A VM gives you a separate Windows environment for installing tools, generating test activity and making changes without using your everyday Windows installation. If something goes wrong, you can restore a snapshot or reset the VM and continue.
For these projects we'll use VirtualBox and Microsoft's Windows 11 Enterprise Evaluation. Microsoft currently provides the Enterprise evaluation as an ISO, making it useful for a temporary Windows lab.
A reasonable starting configuration is:
| VM setting | Starting point |
|---|---|
| Name | SOC-WIN11-01 |
| CPU | 2 virtual CPUs |
| Memory | 4 to 8 GB, depending on your computer |
| Disk | 64 GB |
| Network | NAT |
| Windows account | A generic lab account such as labuser |
Create the VM, attach the Windows ISO and complete the Windows installation normally. Once you're at the desktop, run Windows Update, confirm Microsoft Defender is enabled and take a snapshot in VirtualBox.
That snapshot is your clean starting point. If you break something later, restoring the snapshot is much easier than rebuilding Windows.
Keep Personal Information Out of Your Evidence
You're building these projects because you eventually want other people to see them, so start thinking about operational security now.
Use generic lab names instead of your real identity whenever possible. Before publishing a screenshot, check it for things such as:
- your real name
- personal email addresses
- public IP addresses
- usernames based on your real identity
- employer or school information
- passwords or credentials
- API keys and tokens
- browser tabs or bookmarks
- file paths containing personal information
Redact sensitive information before uploading an image to your portfolio.
The same rule applies to packet captures. Do not upload a full PCAP captured from your everyday network. Packet captures can contain unrelated traffic and information you never intended to publish. Use screenshots of the filtered evidence instead.
Project 1: Follow a Web Connection with Wireshark
Before you can decide whether network traffic looks suspicious, it helps to understand what ordinary traffic looks like. This project starts there.
What You're Learning
When your computer connects to a website, several things happen before the page appears.
The system may need to resolve the site's domain name into an IP address using DNS. It then communicates with the destination using network protocols and ports. HTTPS traffic is encrypted using TLS, while modern browsers may also use newer protocols such as HTTP/3.
You don't need to understand every packet yet. For this project, concentrate on the basic path:
domain -> DNS response -> destination IP -> web connectionWe'll use Wireshark, a free and open-source network protocol analyzer maintained by the Wireshark Foundation.
Generate Something You Can Find
Start Wireshark and begin a capture on the network interface you're currently using.
With the capture running, open your web browser and visit https://www.google.com. Let the page finish loading, then return to Wireshark. You just captured ordinary browser traffic associated with reaching a website. There will probably be other background traffic mixed in as well, which is normal.
Next, leave the capture running and open Command Prompt. Run:
nslookup google.comThis gives you a second, more deliberate example. nslookup asks your configured DNS server to resolve google.com, making the DNS request and response easier to identify in the capture.
Stop the capture after the command finishes. You now have both normal browser activity and a DNS lookup you generated yourself to work with.
Find the DNS Request First
Apply the display filter:
dnsFind the request for google.com. Look at the response. Which DNS server answered the request? Which IP address or addresses were returned?
Now remove the DNS filter and find traffic involving one of those destination addresses.
You may see TCP and TLS traffic. Depending on your system and how the request is made, your results can vary slightly. That's normal. The useful part is being able to identify which systems are communicating and what role the protocols are playing.
Your Project
Use the capture to answer:
- Which DNS server answered your request?
- Which IP address was returned for Google?
- Can you find traffic between your system and one of those destination addresses?
- Which destination port is associated with the HTTPS connection?
- Which protocols appear in the filtered traffic?
- Which Wireshark filters helped you isolate the evidence?
Don't turn the project into a packet-by-packet report. You're learning to use network evidence to answer specific questions.
What to Document
A useful portfolio entry might contain:
- one screenshot of the DNS request and response
- one screenshot of the filtered web connection
- the display filters you used
- a short explanation of what happened between the DNS lookup and connection
Do not upload the full PCAP.
Skills you can document: Wireshark, packet analysis, DNS, TCP/IP, ports, HTTPS, network traffic analysis.
Project 2: What Just Ran? Investigate Windows Processes with Sysmon
Now move from the network to Windows.
When you open a program, Windows creates a process. That process has an executable, a user, a command line, a start time and usually another process responsible for launching it. Those details become useful during security investigations.
Imagine receiving an alert that says:
powershell.exe executedThat isn't enough information to call something malicious. PowerShell is a normal Windows administration tool. You need context.
Who ran it? What command was supplied? What launched PowerShell? What happened around the same time?
Meet Sysmon
Sysmon is a Microsoft Sysinternals tool that records detailed Windows system activity in the Windows Event Log. It can record process creation, network connections and other telemetry that analysts can later search or forward into a SIEM.
Install Sysmon from an elevated Command Prompt or PowerShell window using Microsoft's documented default installation:
sysmon -accepteula -iThe default configuration records process creation, which is enough for this exercise.
Where Do Sysmon Logs Go?
You don't need another security product to view them. Windows has a built-in GUI called Event Viewer.
Open Start and search for Event Viewer, then browse to:
Applications and Services Logs > Microsoft > Windows > Sysmon > OperationalThat is where Microsoft documents Sysmon events being stored on current Windows versions.
For this project, focus on Event ID 1: Process Create. An Event ID is simply an identifier for a particular type of recorded activity.
Start With Something You Already Understand
Open Notepad. Then return to Event Viewer and find the Sysmon process-creation event associated with notepad.exe.
Look through the event. Find the executable path. Find the user. Find the command line. Find the parent process.
You generated the activity yourself, so you already know roughly what happened. That lets you concentrate on understanding how Windows recorded it.
Now open PowerShell and run:
whoamiFind the corresponding PowerShell event. Compare it with Notepad.
Your Project
Generate a handful of normal process events:
- Open Notepad.
- Open Command Prompt and run hostname.
- Open PowerShell and run whoami.
- Open your browser.
- Close the applications.
Then work backward through Sysmon as though you hadn't watched yourself generate them. For at least two processes, identify:
- process name
- executable path
- user
- command line
- parent process
- timestamp
Try explaining what each field tells you rather than copying a definition from Microsoft's documentation.
Sysmon itself does not decide whether activity is malicious. It records evidence that can be interpreted and correlated later.
What to Document
Choose one or two good Event ID 1 examples. Annotate the fields that helped you reconstruct what happened and explain why the command line, user and parent process could matter during a security investigation.
Two useful screenshots are better than twenty screenshots of Event Viewer.
Skills you can document: Windows Event Logs, Event Viewer, Sysmon, process analysis, command-line analysis, endpoint telemetry.
Project 3: The Urgent Materials Payment
For the third project, you'll work an actual security case.
A targeted email has reached an employee responsible for vendor payments. It contains no malware, no attachment and no suspicious link. It's simply asking someone to send money. That makes the investigation less technical in one sense and more realistic in another.
The Situation
Contoso Manufacturing is waiting on a shipment of materials from Northwind Industrial Supply. The materials are needed for an active production job, and Northwind is a real supplier the company has worked with before.
Accounts Payable receives an email from someone claiming to be Sarah Mitchell, the Northwind account manager who normally handles the relationship. The message says the materials are staged for shipment, but an outstanding balance must be paid before the carrier can release them.
The request is for $18,740, and it needs to happen that morning.
The approved Northwind email domain on file is:
northwind.example.comYour job is to determine whether Accounts Payable should trust the request.
How Email Investigations Work in a SOC
In a production environment, analysts may investigate suspicious messages inside an email-security platform such as Microsoft Defender for Office 365, Proofpoint or Mimecast.
For this project we'll work directly with an .eml file so you can examine the same kinds of evidence those tools surface: sender information, headers, authentication results, routing and message content.
For viewing the file, we'll use Mozilla Thunderbird. Thunderbird is free and open source. It can render a saved .eml normally and also expose the underlying message source and headers.
Download and Verify the Case File
Download the case file: northwind-materials-payment.eml
Published SHA-256:
4fcbd08d6943b83c5febb72688367b6645a0a00ba1fc3086673ea9199639f440The sample is created and provided directly by LabList. It contains no attachment, executable content, external images, malicious URL or active phishing infrastructure. Every domain in it uses reserved example namespaces that cannot resolve to real infrastructure.
Before opening it, it is best practice to verify that the file you downloaded matches the one published here. Open PowerShell in the folder containing the .eml file and run:
Get-FileHash .\northwind-materials-payment.eml -Algorithm SHA256Compare the result with the SHA-256 published above. They should match exactly.
Alternatively, you can upload the .eml file directly to VirusTotal. VirusTotal is a free analysis service commonly used during security investigations to check files, URLs, domains and other indicators against multiple security engines. When you upload a file, VirusTotal will analyze it and also display information about the file, including its cryptographic hashes such as SHA-256.
For this training sample, you should expect the file to come back clean. It contains no malware, attachments or malicious links. The value here is getting familiar with a tool you may encounter during real investigations and seeing how the SHA-256 reported by VirusTotal compares with the hash you calculated yourself.
Keep in mind that files submitted to public analysis services may be retained or shared with security researchers and partners. Never upload a real company email, confidential document or sensitive attachment to VirusTotal unless your organization's procedures explicitly allow it.
Read It Like the Employee First
Open the .eml file in Thunderbird. Don't immediately jump into the headers. Read the email the way the Accounts Payable employee would.
The message should look roughly like this:
Subject: RE: Materials Order 7714 - Payment Needed Before Release

Hi Daniel,

Quick update on the materials for order 7714.

Our warehouse has everything staged and the carrier is scheduled to
collect this afternoon. Accounting flagged the order this morning
because the remaining materials balance has not cleared yet.

If we miss today's pickup, the next available freight window isn't
until Monday and I know your team was trying to avoid another
production delay.

Can you have the remaining $18,740 sent this morning using the
updated remittance information below?

Account Name: Northwind Materials LLC
Bank: Example National Bank
Account: ****8842
Reference: PO-7714

Please send me the payment confirmation once it's submitted so I can
have the warehouse release the load to the carrier.

I'm heading into our 9:30 production meeting, so email is probably
the easiest way to reach me for the next couple of hours.

Thanks,

Sarah Mitchell
Account Manager
Northwind Industrial Supply
Nothing is misspelled. There isn't a giant red warning telling you that it's phishing.
The email knows the supplier, the purchase order, the materials shipment and the employee responsible for payment. That's what makes it targeted.
Now Look Underneath the Message
Thunderbird's message view shows basic sender information. Its View Source option exposes the original message and full headers.
The case file contains:
From: "Sarah Mitchell | Northwind Industrial Supply" <sarah.mitchell@northwind-supply.example.net>
Reply-To: sarah.mitchell@northwind-payments.example.org
The approved vendor domain is northwind.example.com. Those are not the same domains.
Now you have something to investigate.
The Email Passes SPF, DKIM and DMARC. So Why Isn't It Safe?
Look a little deeper in the message source and you'll find this:
Authentication-Results: mail.contoso.example.com;
    spf=pass smtp.mailfrom=northwind-supply.example.net;
    dkim=pass header.d=northwind-supply.example.net;
    dmarc=pass header.from=northwind-supply.example.net
Three passes. If you've read anywhere that DMARC stops phishing, this looks like a clean bill of health. It isn't, and understanding why is one of the most important lessons in this entire project.
SPF, DKIM and DMARC answer one narrow question: did this message really come from the domain it claims to come from? Here the claimed domain is northwind-supply.example.net, a lookalike the attacker registered and fully controls. They set up its DNS records themselves, so mail from it authenticates perfectly. The checks are telling the truth: the message genuinely came from northwind-supply.example.net.
What the checks cannot tell you is that northwind-supply.example.net has no relationship with your vendor. The approved domain on file is northwind.example.com. Email authentication validates the sending domain's identity, not the sender's relationship to your organization. That's why lookalike-domain BEC routinely sails through with spf=pass, dkim=pass and dmarc=pass, and why an analyst who treats those results as a verdict will clear messages that should be escalated.
Treat authentication results as one piece of evidence about who sent the message, then keep going: is that domain the one your organization actually does business with?
Work the Case
Answer the questions an analyst would need to answer:
- Who does the sender claim to represent?
- What email domain should Northwind normally use?
- What domain actually sent the message?
- Where would a reply to the email go?
- What is the employee being asked to do?
- Why might the request initially seem believable?
- What creates urgency?
- Is the sender discouraging normal verification in any way?
- Do you have enough evidence to allow the payment?
- What should Accounts Payable do next?
- The Authentication-Results header shows spf=pass, dkim=pass and dmarc=pass. Why does that not clear the message?
You don't need to identify the attacker. For a Tier 1 analyst, the correct outcome may simply be that the message cannot be trusted and needs to be escalated or independently verified.
A sensible response would be to hold the payment and contact Northwind using previously established contact information, rather than replying to the suspicious email or relying on information contained inside it.
What to Document
Build a small evidence table from your investigation.
| Evidence | Your finding |
|---|---|
| File hash | SHA-256 and whether it matched the published case file |
| Claimed sender | Who the message claims to be from |
| Approved vendor domain | Domain already known to Contoso |
| Actual sender domain | Domain in the From address |
| Reply-To | Where a response would be delivered |
| Authentication results | SPF/DKIM/DMARC outcomes and what they do and do not prove |
| Payment request | What the employee is being asked to do |
| Urgency | Why the employee is being pushed to act |
| Business context | Why the email initially looks plausible |
| Disposition | Legitimate, suspicious or malicious |
| Recommended action | What should happen next |
Useful screenshots include the rendered email, Thunderbird's sender/header view, the relevant portion of the raw message source and the hash verification. Don't screenshot unrelated desktop content. Keep the evidence focused.
Skills you can document: spear phishing, business email compromise, email headers, email authentication (SPF, DKIM, DMARC), sender analysis, SHA-256 hashing, IOC enrichment, social engineering, security documentation, incident triage and escalation.
Project 4: The Failed Login Alert (Your First SIEM Investigation)
So far you've worked close to the original evidence. Wireshark showed you network traffic. Event Viewer showed you Windows events. Thunderbird let you examine an email directly.
A SOC has too many systems producing too many events for analysts to inspect everything individually. That's where a SIEM becomes useful.
SIEM stands for Security Information and Event Management. At a basic level, a SIEM collects security data from different systems and gives analysts one place to search, correlate and alert on it. We'll use Wazuh, a free and open-source security platform.
Add Wazuh to the Lab
For a first project, there is little value in spending several days manually installing every Wazuh server component.
Wazuh provides an official prebuilt OVA virtual appliance that includes its central components and can be imported into VirtualBox. The current appliance is configured with 4 CPU cores, 8 GB of RAM and 50 GB of storage by default.
Check your computer before starting this project. You'll be running both the Wazuh VM and your Windows VM, so a lower-spec laptop may struggle with the default allocation.
Import the Wazuh OVA into VirtualBox. Wazuh's current VirtualBox instructions also recommend setting the imported VM's Graphics Controller to VMSVGA and enabling Hardware Clock in UTC Time under the VM's system settings.
The Wazuh appliance uses a Bridged Adapter by default. For this lab, we'll switch it to a VirtualBox NAT Network so the Wazuh and Windows VMs can communicate on the same private virtual network.
Put the VMs on the Same Lab Network
VirtualBox's standard NAT mode gives an individual VM outbound network access, but separate VMs using normal NAT are isolated from each other by default. A NAT Network allows the Windows and Wazuh VMs to communicate with one another while still providing outbound network access.
Power off both VMs before changing their network settings.
- In VirtualBox, open File > Tools > Network Manager.
- Select NAT Networks and create a new network.
- Give it a recognizable name such as SOC-LAB and leave DHCP enabled.
- Open the settings for SOC-WIN11-01.
- Under Network > Adapter 1, change Attached to from NAT to NAT Network and select SOC-LAB.
- Open the Wazuh VM's network settings and attach its first adapter to the same SOC-LAB NAT Network.
- Start the Wazuh VM, then start the Windows VM.
VirtualBox should assign both VMs private addresses on the same virtual network.
Access the Wazuh Dashboard
From the Wazuh VM console, log in using the credentials provided in Wazuh's appliance documentation:
user: wazuh-user
password: wazuh
Run:
ip aFind the IP address assigned to the Wazuh VM. Because both systems are on the same NAT Network, use the browser inside SOC-WIN11-01 to open:
https://<WAZUH_SERVER_IP>The Wazuh appliance currently uses these dashboard credentials:
user: admin
password: admin
The dashboard may take a few minutes to finish initializing after the Wazuh VM starts.
There is no initial dashboard setup wizard required for this project. Wazuh's virtual appliance ships with its central components already configured to work together.
Your checkpoint here is simple: make sure the Wazuh dashboard opens from the Windows VM before installing the agent.
Connect Windows to Wazuh
The Wazuh agent runs on the system you want to monitor and sends its security data to the Wazuh manager.
Inside the Wazuh dashboard, go to Agents management > Summary > Deploy new agent. Select Windows and follow the generated deployment instructions, using the Wazuh VM's SOC-LAB IP address as the Wazuh server address. Wazuh's Windows agent installation guide covers the same steps.
After installing the agent, return to Agents management > Summary and verify that SOC-WIN11-01 appears as an active agent.
If it doesn't, fix the connection before moving on. There isn't much value in troubleshooting an alert until you know the endpoint is successfully sending data to Wazuh.
Understand the Event
Windows records failed authentication attempts in its Security event log. One event you'll commonly encounter is Event ID 4625: An account failed to log on.
You're now moving from something you could inspect locally in Event Viewer to something collected and searchable through the SIEM.
Generate the Activity
Use a generic lab account with a password that you don't use anywhere else.
Lock the Windows VM and deliberately enter the wrong password several times. Then authenticate normally with the correct password. You're creating a known sequence:
failed -> failed -> failed -> successfulNow return to Wazuh and search the Windows security activity.
Your exact Wazuh rule numbers or alert wording may change between versions. Don't build the project around memorizing a particular rule ID. Build it around the evidence.
Investigate the Alert
Start with the failed authentication events.
- Which account was involved?
- When did the failures occur?
- How many were there?
- What type of login was attempted?
- Do you see the successful authentication afterward?
- Can you build a timeline of the activity?
Then ask the more important question: would this concern you in a real environment?
Three mistyped passwords from an employee sitting at their own workstation tell a different story from hundreds of failures against multiple accounts from an unfamiliar source. Context determines the next step.
What to Document
Keep:
- the Wazuh alert or event
- an underlying Windows authentication event
- the Wazuh search or filters you used
- the successful login if you correlated it
- a short timeline
- your disposition
Write the final result like an analyst case note. For example:
Disposition: Expected test activity / false positive.

Evidence: Repeated failed authentication attempts against the test
account were followed by a successful login from the same lab system
within several minutes.

Action: No escalation required for the controlled test. Additional
source, user and endpoint context would be reviewed before closing
the same alert in a production environment.
That's enough.
Skills you can document: SIEM, Wazuh, Windows Security Logs, authentication analysis, alert triage, log correlation, false-positive analysis and incident documentation.
Project 5: Defender Found Something (Triage an Endpoint Security Alert)
The final project combines several things you've already practiced. Windows generates activity. A security product detects something. Wazuh collects the event. You investigate the evidence and decide what should happen next.
You are not going to download real malware. Instead, we'll use the EICAR anti-malware test file.
What Is EICAR?
EICAR is a standardized harmless test file designed specifically to trigger antivirus products. Microsoft recommends it for testing Microsoft Defender detections because it generates the security behavior without requiring actual malware.
Use Microsoft's instructions for the exercise rather than downloading a supposed malware sample from a forum, repository or file-sharing site.
First, Confirm Where Defender Records Its Events
Before sending anything to Wazuh, look at the source.
On SOC-WIN11-01, open Event Viewer and browse to:
Applications and Services Logs > Microsoft > Windows > Windows Defender > OperationalMicrosoft documents this as the local Windows event channel used for Microsoft Defender Antivirus activity. You can also read the same channel from PowerShell:
Get-WinEvent -LogName 'Microsoft-Windows-Windows Defender/Operational'You don't need to analyze the events yet. The important point is understanding where the data originates before Wazuh begins collecting it.
Configure Wazuh to Collect Defender Events
For this single Windows VM, we'll configure the Wazuh agent locally. Wazuh also supports centralized agent configuration, but that adds complexity we don't need for this project.
On SOC-WIN11-01, open Notepad as Administrator, then open the Wazuh agent configuration file:
C:\Program Files (x86)\ossec-agent\ossec.confFind the existing <ossec_config> section and add the following block inside that section:
<localfile>
  <location>Microsoft-Windows-Windows Defender/Operational</location>
  <log_format>eventchannel</log_format>
</localfile>
Save the file. Then open PowerShell as Administrator and restart the Wazuh agent service (Windows registers it as WazuhSvc):
Restart-Service -Name WazuhSvcConfirm that the service is running:
Get-Service -Name WazuhSvcThe service status should return as Running. Wazuh's Windows Defender log collection guide documents the same configuration.
Wazuh already includes decoders and detection rules for Windows Defender events, so you do not need to write a custom decoder or rule for this project.
Return to the Wazuh dashboard and confirm that SOC-WIN11-01 still appears as an active agent before generating the test detection.
Generate the Detection
Make sure Microsoft Defender real-time protection is enabled. Then follow Microsoft's EICAR validation procedure inside SOC-WIN11-01.
On Windows, Microsoft's current procedure uses the standard EICAR string in a text file. Defender intentionally treats the file as malware and generates a real security detection.
Don't disable Defender because it deletes the file too quickly. The detection and removal are the behavior you're trying to observe.
After generating the test, check three places:
- Windows Security
- Event Viewer > Windows Defender > Operational
- Wazuh
You now have several views of the same security event.
If the detection appears locally in Defender and Event Viewer but not in Wazuh, go back to the collection configuration before troubleshooting anything else. Confirm the event-channel name, make sure the XML block is inside <ossec_config>, and verify that the Wazuh agent restarted successfully.
Work It Like a Tier 1 Alert
Start with the security alert and answer:
- Which endpoint generated the detection?
- Which user was associated with the activity?
- What did Defender detect?
- Where was the file located?
- What action did Defender take?
- Was the file quarantined or removed?
- Can you find the corresponding Defender event?
- Does Wazuh show the same underlying activity?
- Based on the evidence available, would you close or escalate the alert?
You already know EICAR is harmless because you created it yourself. Pretend you don't know that for a moment. What evidence would an analyst need before making a decision? That's the exercise.
Tier 1 malware triage usually isn't reverse engineering. It's gathering context, validating what the security product saw, establishing what action was taken and deciding whether deeper investigation is required.
What to Document
Build a small incident record.
| Field | What to record |
|---|---|
| Alert source | Microsoft Defender / Wazuh |
| Endpoint | Your Windows lab VM |
| User | Generic lab account |
| Detection | EICAR test file |
| File location | Path reported by Defender |
| Security action | What Defender actually did |
| Additional evidence | Relevant Defender/Wazuh events |
| Disposition | Authorized test activity |
| Escalation | Whether further investigation is needed |
Use the values from your own investigation rather than copying an example result. Useful evidence might include:
- Defender detection screenshot
- Event Viewer evidence
- Wazuh alert
- Wazuh query or filter
- short timeline
- final case note
An optional final exercise is to write a short Tier 2 handoff as though you had decided the alert required escalation. That forces you to answer an important question: what would the next analyst need to know so they don't have to repeat your work?
Skills you can document: Microsoft Defender, endpoint security, SIEM, Wazuh, malware-alert triage, event correlation, documentation and escalation.
What Should Go Into Your SOC Portfolio?
You don't need every screenshot you took while learning. A strong project shows enough evidence for somebody else to follow your reasoning.
For most of these projects, that means some combination of:
| Evidence | What it proves |
|---|---|
| Starting event | What began the investigation |
| Relevant logs or artifacts | What evidence you relied on |
| Search or filter | How you found the useful data |
| Short timeline | How the events fit together |
| Findings | What the evidence told you |
| Disposition | How you classified the activity |
| Next step | Close, verify, contain or escalate |
Don't include an image because the dashboard looks impressive. Include it because you can explain why it mattered.
A simple write-up structure is enough:
- Scenario: What happened?
- Objective: What were you trying to determine?
- Investigation: What evidence did you examine?
- Findings: What did that evidence tell you?
- Disposition: How did you classify the activity?
- Next step: What should happen now?
That gives the reader of your portfolio enough structure to understand your work without turning each project into a ten-page incident report.
What These Five Projects Actually Prove
After the first project, you can look at basic network traffic and explain how a system finds and communicates with a destination.
After the second, Windows Event Viewer isn't just a wall of fields. You can identify a process, its command line, its user and the process that launched it.
The email investigation introduces a different kind of security problem. There isn't malware to find or an alert telling you the answer. You have to compare identities, understand the request, recognize the social-engineering pressure and make a reasonable decision.
Then you add the SIEM. By the final project, you've worked from an endpoint-security detection through centralized logs and written a basic analyst disposition.
That's a reasonable progression for someone trying to become a Tier 1 SOC analyst. You aren't pretending to be an incident-response lead. You're practicing the first layer of security analysis: gather the evidence, understand what it says, document what you found and recognize when the problem needs to move to someone else.
Those are useful things to be able to show.
Turn the Work Into a SOC Analyst Portfolio
Completing the project gives you practice. Documenting it gives you proof.
The screenshots, alerts, event logs, investigation notes and case decisions you created here are exactly the kinds of artifacts you can turn into project write-ups on LabList.
Instead of leaving the work scattered across folders on your computer, build a profile where an employer can see the project, understand what you investigated, review the evidence you chose to share and connect that work to the skills you're claiming.
You can start with 14 days of full access with no credit card required. Build your portfolio, publish it and share it while you decide whether LabList works for you.
You are never charged unless you add a payment method yourself. After the 14 days, you decide whether you want to become a member and keep adding, editing and growing your portfolio.